As I mentioned in the Windows 10 review last week, here is the trick to disable forced automatic Windows updates in Windows 10 and also disable annoying inbuilt Antimalware.![]()
Disable Windows Automatic Updates
With Windows 10, Microsoft came with forced automatic updates. Unfortunately, it got worse, and some of the updates caused havoc for many users and Microsoft had to pull some of the updates. And this is not the first time, I have experienced Windows updates cause trouble in old versions too – like Windows XP.
Honestly, I am not against the software updates strategy, but users must be allowed to choose when they want to update their software and opt which updates they want to download and install. Forcing the users to download and install all the updates anytime is really annoying.
In Windows 10, there is no option to disable Windows Update from Control Panel unlike previous versions of Windows. Here is how to disable Windows updates in Windows 10:
Method 1: Setting your internet connection as metered connection
If your PC is connected to the internet using using Wi-Fi connection, this is the best and easiest method I have found to disable Windows 10 updates.
Click on the Wi-Fi icon to the right side of the taskbar. Select “Properties” of the Wi-Fi connection to open connection settings. Turn on the “Set as metered connection” setting and that’s it.

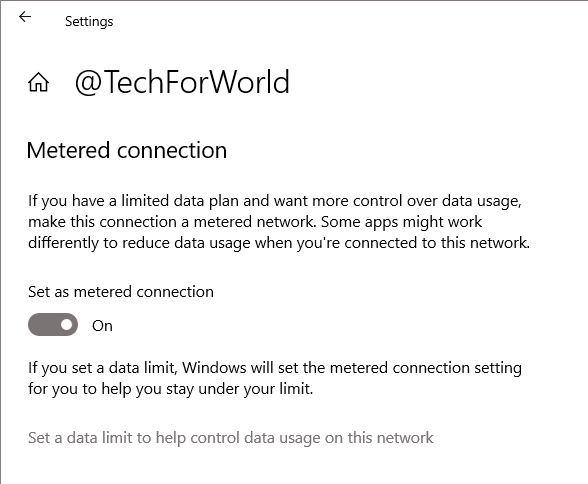
Now Windows will not automatically download updates. This trick works both for Wi-Fi router or mobile hotspot. However , whenever you wish, you can go to Windows Update settings and check for any Windows updates available and can manually download the updates while the internet connection is still set as metered.
Method 2: Tweaking settings:
1. Open Windows Services using the run command ‘Services.msc’ or go to Control Panel -> Administrative Tools -> Services. Look for the service named ‘Windows Update‘ in the list. Right click and Stop it. Again right click and open Properties. In the Startup Type, select ‘Disabled’.
2. Open Group Policy Editor using the run command ‘gpedit.msc’ or search for it in the search bar. In the Group Policy Editor window, navigate to Computer Configuration -> Administrative Templates -> Windows Components -> Windows Update. Double click the item ‘Configure Automatic Updates’ and disable it.
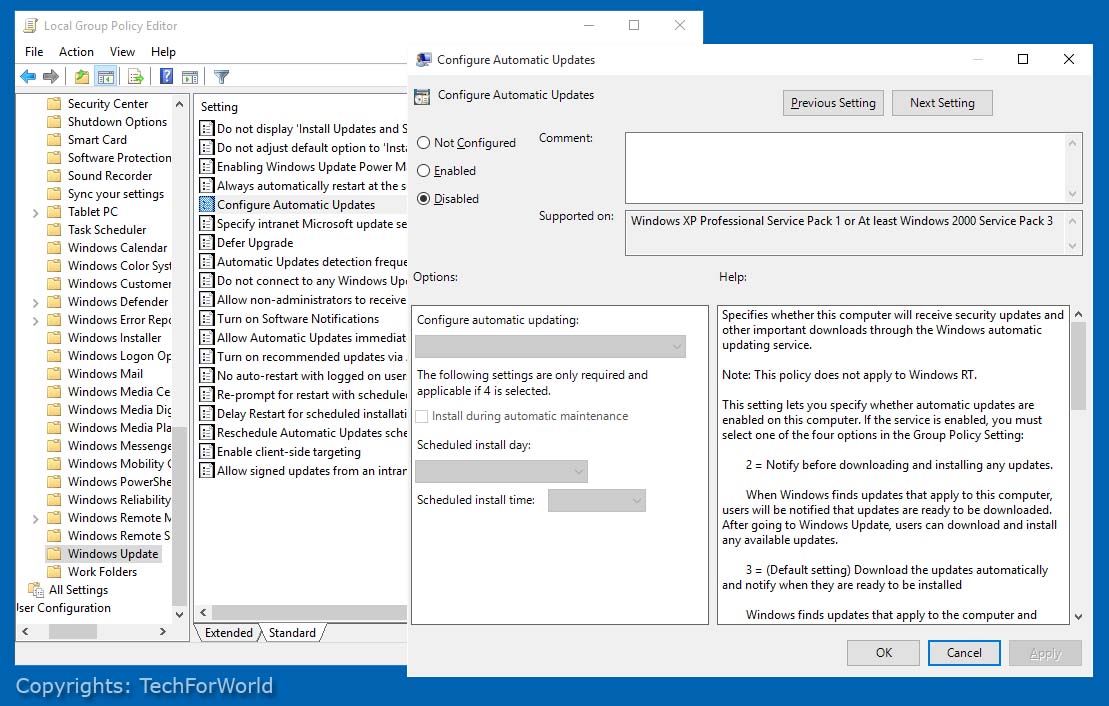
Disable Windows Automatic Updates from Group Policy Editor (Click to enlarge)
3. Open Task Scheduler using the run command ‘control schedtasks’ or from Control Panel -> Administrative Tools.
Navigate to Task Scheduler Library -> Microsoft -> Windows -> WindowsUpdate. Right click the itme ‘sihboot’ and Disable.
Disable Windows Antimalware
I also noticed that “Antimalware Service Executable” in Windows 10 hogs your computer’s resources, and uses too much of RAM and CPU. I also found many other Windows 10 users complaining the same.
1. Go to Windows Services (from Control Panel or run command Services.msc), find the service named Windows Defender. Right click and Stop it. Also disable it from Properties.
2. Open Task Scheduler using the run command ‘control schedtasks’ or from Control Panel -> Administrative Tools.
Navigate to Task Scheduler Library -> Microsoft -> Windows -> Windows Defender. Right click all 4 items under this folder and disable them one by one.
3. Open Group Policy Editor using the run command ‘gpedit.msc’ or search for it in the search bar. In the Group Policy Editor window, navigate to Computer Configuration -> Administrative Templates -> Windows Components -> Windows Defender. Double click the item ‘Turn off Windows Defender’ and ‘enable’ it.
4. Also go to ‘Windows Defender’ settings from Control Panel and turn it off manually.
Leave a Reply